Checkout is where good intentions meet real-world pressure: long lines, mixed baskets, barcode surprises, and customers who just want a smooth experience. If your team understands how EBT transactions work at checkout, you’ll see fewer voids, fewer customer disputes, faster lanes, and cleaner paperwork.
You’ll also reduce compliance headaches because most EBT problems aren’t “big fraud”—they’re everyday mistakes: an item mapped wrong in inventory, a cashier hitting the wrong tender key, or a split tender handled inconsistently.
I’ve trained cashiers, set up POS systems, and helped stores recover from those “Why did this decline?” moments. The best operations treat the EBT checkout process like any other payment flow: clear steps, consistent scripts, and a POS configuration that does the heavy lifting.
In this guide, you’ll learn the practical EBT transaction process at checkout from start to finish—what happens on-screen, what cashiers should say, how eligibility is determined, and what to do when something goes sideways. You’ll also get checklists, troubleshooting workflows, and training plans you can put into practice immediately.
Quick definitions: SNAP vs EBT, and what “EBT at checkout” really means
Before you train anyone, align on language. Confusion over terms causes confusion at the lane.
EBT is the payment method—think of it as the card and network used to access certain benefits. At checkout, “EBT” usually involves a PIN entry for authorization. Your POS and the EBT terminal handle the request, approve or decline it, and return the result.
SNAP EBT is a common benefit type accessed through EBT. When someone says “paying with EBT,” they often mean “paying for eligible food items using SNAP EBT.”
The key operational point is that eligibility is item-based, not customer-based. Your lane isn’t deciding who qualifies; your system is deciding what items qualify according to your configuration and program rules.
So what does “EBT at checkout” actually mean?
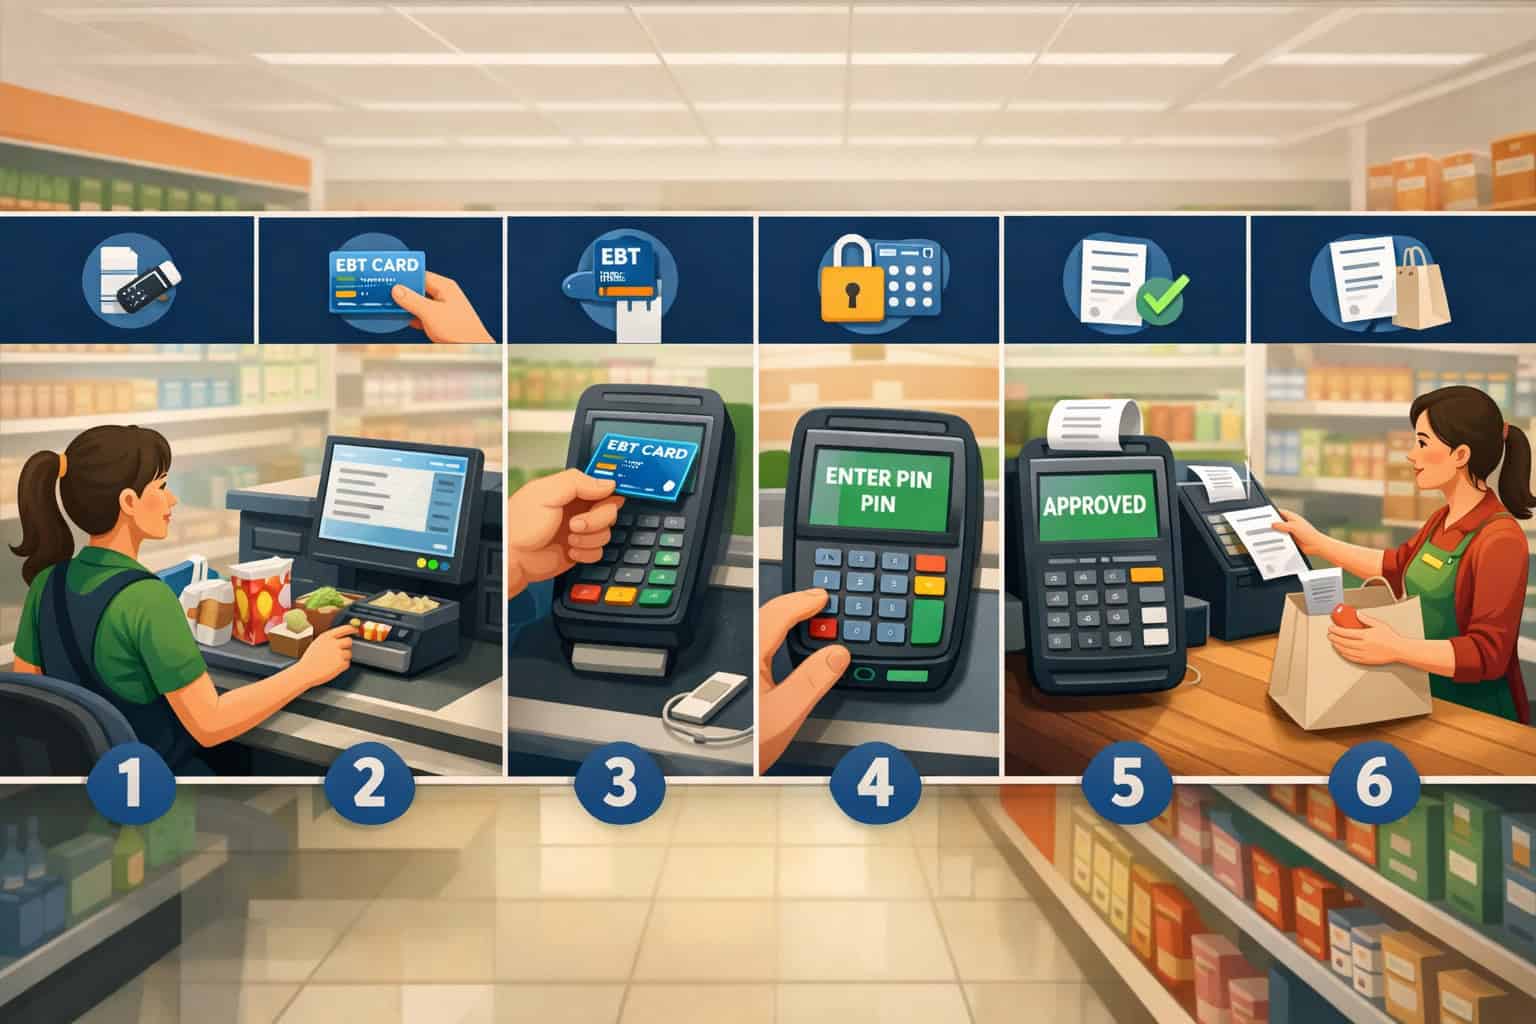
- The cashier rings up a basket.
- The POS separates eligible vs ineligible items into different totals.
- The customer chooses EBT as the tender for the eligible portion.
- The customer enters a PIN to authorize.
- If the eligible portion is fully covered, EBT pays it; if not, you handle partial approval and potentially split the tender for the remaining amount.
- Receipts print with the EBT payment details and (where supported) remaining balance information.
This is why understanding how EBT transactions work at checkout matters: you’re not “running one payment.” You’re often running two totals and possibly two tenders inside one checkout flow.
The full EBT checkout process, step by step (cashier view)
The most reliable EBT checkout process is one your team can execute the same way every time, even during rushes. Below is a practical walkthrough of EBT transaction steps for retailers at the lane, including what’s happening behind the scenes and what to say to keep the customer informed.
At a high level, the system is doing three jobs simultaneously:
- Building the basket (scans, weights, PLUs).
- Classifying items as eligible or ineligible based on inventory flags.
- Running authorization via the terminal/network when EBT tender is selected.
If any one of those jobs is misconfigured, you’ll see wrong totals, unexpected declines, or customer frustration.
Here’s the clean, cashier-ready sequence:
- Scan/enter all items normally.
- Verify the POS is showing eligible and ineligible totals (or prompts you appropriately).
- Select EBT tender for the eligible portion.
- Have the customer enter their PIN privately.
- Confirm approval/partial approval/decline message.
- If there’s remaining ineligible or uncovered eligible amount, complete a split tender.
- Print receipts, confirm totals, and handle any balance messaging your system supports.
Scanning items and how eligibility is determined
Eligibility is determined at the item level, typically via product setup in your POS: category, tax flags, department codes, and PLU/inventory flags.
When a cashier scans a barcode, the POS looks up the item record and checks whether it’s tagged as eligible under your EBT rules. For weighted or produced items, eligibility is often tied to PLU mapping and department setup, not just barcode.
This is why two items that “look similar” can behave differently at checkout. One is mapped correctly; the other is miscategorized. A common example is a new item added to inventory without the right eligibility flag, or a seasonal SKU created quickly and placed in a default department that’s ineligible.
To keep the lane moving, cashiers don’t need to memorize a rulebook. They need a consistent routine:
- Scan items as normal and watch for the POS to sort totals.
- If an item rings as ineligible but the customer expects it to be eligible, don’t argue at the lane.
- Use a manager override process: price/department check, item lookup, or replace with a correctly mapped SKU if appropriate.
- If the POS supports it, use an “eligibility check” screen or item details view.
What to say when there’s confusion:
- “It looks like the register is marking that item as not eligible. We can finish your eligible items on EBT and you can choose another payment method for the rest.”
- “If you’d like, we can ask a supervisor to verify the item setup.”
Separating eligible and ineligible totals without slowing down the line
In a well-configured lane, the POS automatically separates totals into eligible and ineligible amounts as the basket is built. Some systems show two running subtotals on-screen; others reveal the breakdown only when the cashier selects EBT tender. Either way, the cashier’s job is to confirm the split before the customer enters their PIN.
This is the moment where small mistakes cause big headaches. If a cashier selects the wrong tender first, or tries to run EBT against the entire basket total, you can get declines, awkward reversals, or an incomplete payment state that requires a manager to unwind.
A practical lane routine looks like this:
- Finish scanning, then pause for one second.
- Ask: “Are you paying with EBT today?”
- If yes, select EBT tender and allow the POS to present the eligible amount.
- Confirm the eligible amount is what the system will run on EBT.
- Only then prompt for PIN entry.
If your POS allows cashier selection of what portion to apply to EBT, train a single policy. Most stores choose one of these approaches:
- Default policy: Apply EBT to the maximum eligible amount automatically.
- Customer-choice policy: Ask the customer how much they want to apply (less common and higher risk for cashier error).
Customer-choice increases disputes because a rushed cashier may enter the wrong amount. Default policy is typically faster and more consistent.
PIN entry and authorization: what’s happening and what to watch for
Once EBT tender is selected, the terminal prompts the customer for PIN entry. The POS sends the eligible amount to the terminal (for integrated setups) or the cashier enters it on the terminal (for some standalone flows). The terminal then sends an authorization request through the network, which returns:
- Approved (full amount)
- Partially approved (less than requested)
- Declined (no authorization)
Cashiers should focus on privacy and clarity. PIN entry must be done by the customer, and your staff should never ask for a PIN or touch the keypad unless your device workflow explicitly supports accessibility assistance and you have a store policy for it.
What to watch for on-screen:
- Prompt changes from “Enter PIN” to “Processing” to “Approved/Declined.”
- The approved amount displayed—especially if a partial approval occurs.
- Any printed slip requirements (some setups print a merchant copy or require a customer signature, depending on configuration).
What to say while keeping things calm:
- “Go ahead and enter your PIN when you’re ready.”
- If it’s taking time: “It’s processing—thank you for your patience.”
- If declined: “It didn’t approve this time. You can try again, or we can use another payment type for the remaining balance.”
Handling split tender when part of the basket isn’t eligible
Split tender is the heart of real-world EBT lane operations. A mixed basket is normal: eligible items plus non-eligible items, plus possibly an eligible portion not fully covered due to a low balance.
A clean split tender flow follows a strict order:
- Run EBT tender for eligible items first.
- Confirm approved amount and remaining balance due.
- Take the second payment method for the remaining amount.
The key is that the cashier should not “fight” the POS. If the system says an item is ineligible, you treat it as ineligible at the lane. If the customer wants to adjust the basket (remove ineligible items, swap items, reduce quantities), do it before running the second tender whenever possible. That prevents complicated returns or post-transaction refunds.
Best practices for split tender:
- Tell the customer the plan before running EBT: “I’ll run the eligible part on EBT, then you can pay the rest another way.”
- If there are coupons or discounts, ensure your POS applies them correctly before tender. Misapplied discounts can shift eligibility totals unexpectedly.
- If the customer wants to remove items after EBT approval, pause and get a supervisor if your policy requires it.
What to say during split tender:
- “EBT covered the eligible items. Your remaining total is for the non-eligible items.”
- “You can pay the rest with card, cash, or another tender.”
Printing receipts and explaining remaining balances (within system limits)
Receipt handling is where customers often decide whether the experience was “smooth” or “confusing.” Even if your POS did everything correctly, unclear messaging can trigger disputes: “I thought it paid for everything,” or “Why does this receipt show two totals?”
Most systems print:
- The total sale amount.
- The EBT amount approved and applied.
- The remaining balance due and the second tender amount (if split tender).
- A transaction reference number (helpful for disputes and transaction logs).
- Sometimes a remaining EBT balance, depending on terminal capability and settings.
Train cashiers to:
- Hand the receipt(s) to the customer and summarize in one sentence.
- Avoid guessing about balances if the receipt doesn’t clearly show them.
- Use the terminal’s balance inquiry function only if your store policy allows and the system supports it.
Helpful receipt script:
- “Here’s your receipt—EBT paid for the eligible items, and your other payment covered the rest. This line shows the EBT amount.”
If a customer asks, “What’s my remaining balance?” and the receipt shows it, point to it. If it doesn’t, use a neutral response:
- “This receipt doesn’t show the remaining balance on our side. You can check through your usual balance method, or we can try a balance inquiry if the terminal supports it.”
Eligible vs ineligible items, explained in plain language
At the lane, you need a high-level understanding—not a complex rulebook. Cashiers should know that eligibility is based on program rules and how items are configured in your POS, and that some items are restricted even if customers assume otherwise.
In plain terms:
- Eligible items are typically everyday grocery-type items intended for home preparation and consumption.
- Ineligible items include categories that are not intended to be purchased with SNAP EBT, and items that your system flags as restricted.
The most important operational message is consistency: your POS should enforce eligibility rules, and your staff should follow the POS result. If there’s a mismatch, treat it as an inventory setup issue or a policy question—don’t improvise at the lane.
Key concepts your team should understand:
- Eligibility is attached to the item record (barcode/PLU) and department/category mapping.
- Some items may be ineligible due to rules about prepared foods; the hot foods rule is a common source of confusion. Keep it high-level at checkout and refer questions to management or posted guidance.
- Taxes can signal ineligibility in some setups. If your POS uses tax flags to help categorize eligibility, a misapplied tax setting can cause wrong EBT behavior.
What to do when an item surprises the customer:
- Confirm what the POS shows.
- Offer choices: remove the item, replace it, or pay with another tender.
- Escalate repeated issues to the manager for SKU review.
Item restrictions, the hot foods rule, and how to handle questions without arguing
Customers may ask why something isn’t eligible. The wrong move is debating rules at the register. The right move is to keep the line moving and offer practical options.
A cashier-friendly approach:
- Avoid making definitive statements that sound like legal guidance.
- Don’t shame or blame the customer.
- Don’t override eligibility manually unless your POS and policy explicitly allow it (and even then, use management oversight).
Example scripts:
- “The register is marking that item as not eligible. We can set it aside or you can pay for it separately.”
- “Some prepared items can be restricted. A supervisor can help confirm the policy if you’d like.”
If your store sells both grocery and prepared foods, train a consistent approach for items near the boundary (for example, items that are heated or intended for immediate consumption). Even when the rules are clear, the customer’s experience matters. Keep it respectful, brief, and operational.
Operational reminders:
- If the POS flags it as ineligible, that’s the lane decision.
- If the customer wants to adjust the basket, do it before completing the second tender.
- If the same item repeatedly causes confusion, review the product mapping and signage.
Taxes, discounts, and coupons: how they interact with EBT totals
This is where even experienced cashiers slip. Discounts, coupons, and taxes can change which portion is billed to EBT and which portion becomes “other tender.” If your POS is set up properly, it will allocate discounts across eligible items correctly, but not all systems do this the same way.
Practical guidance for operations:
- Taxes: Many EBT-eligible items are not taxed, but tax settings vary by item category and store configuration. If your POS uses tax flags as part of eligibility logic, misconfigured taxes can cause incorrect eligibility separation.
- Discounts: A store discount applied after tender can throw off totals. Train staff to apply discounts before running EBT.
- Coupons: Some coupons apply only to certain items, and some POS systems allocate coupon value across the eligible bucket automatically. If the coupon is entered incorrectly, the EBT eligible total may not match expectations.
Cashier routine that prevents errors:
- Scan everything.
- Apply coupons/discounts.
- Confirm eligible/ineligible totals.
- Run EBT tender.
- Complete split tender.
If customers dispute totals after tender, the first step is to re-check the receipt and item list. The second step is to involve a supervisor rather than attempting ad-hoc fixes.
Partial approvals: what they mean and what cashiers should say
A partial approval happens when the system approves less than the requested eligible amount—usually because the customer’s available balance is lower than the eligible total. This is common, and it’s not a “problem” unless your staff doesn’t know how to finish the transaction cleanly.
What partial approval looks like:
- The terminal displays an approved amount that is lower than the eligible amount requested.
- The POS updates the remaining balance due.
- The customer must pay the remainder using another tender or remove items.
Cashiers should never imply wrongdoing. It’s simply a balance-limited authorization.
Best cashier script:
- “It approved this amount on EBT. Your remaining balance is this amount. How would you like to pay the rest?”
What to do operationally:
- Confirm the approved amount on the POS matches the terminal/receipt.
- Continue with split tender for the remaining amount.
- If the customer wants to remove items to reduce the remaining balance, do so before taking the second payment when possible.
Common pitfalls:
- Re-running EBT immediately without understanding the partial approval can create confusion or duplicate authorizations.
- Voiding incorrectly after partial approval can be tricky depending on system behavior; follow your store’s void procedure and involve a manager if needed.
Voids vs refunds: how they typically work and why it matters
Voids and refunds are not interchangeable, and misunderstanding them creates compliance risk and customer dissatisfaction.
Void means canceling a transaction (or tender) before it fully settles in your system. In many POS environments, a void is the cleanest way to correct a mistake made immediately at checkout, especially if you haven’t completed all tenders.
Refund means returning funds after the sale is completed. Refund behavior for EBT can have restrictions depending on your system configuration and program rules.
Your store should have a clear returns policy that explains how EBT-related returns are handled, including whether refunds go back to the EBT account or are issued as store credit per your policy and system capability.
Practical lane guidance:
- If you catch an error before finalizing payment, prefer a void (following your policy).
- If the sale is already completed, treat it as a return/refund process and move it to customer service or a manager lane if that’s your policy.
- Never “make it right” by giving cash out for EBT-paid items unless your policy and system explicitly support it and it’s permitted under applicable rules.
Train cashiers to escalate:
- EBT refund requests
- Any refund involving split tender
- Any dispute where receipts don’t match what the customer believes happened
Balance inquiries: what’s possible and common limitations
Customers often ask to check their balance at checkout. Some terminals support balance inquiry functions; others don’t. Some stores allow cashiers to run a balance inquiry; others limit it due to lane speed or policy.
If your system supports it, balance inquiry typically requires:
- Selecting the balance inquiry function on the terminal or POS.
- Customer PIN entry.
- A printed or displayed balance result (depending on device settings).
Common limitations:
- Not all terminals show or print balances.
- Some setups may show balances only after an approved purchase.
- Balance information may be restricted or configured off by policy.
Train staff to respond consistently:
- If supported: “We can run a balance inquiry—please enter your PIN.”
- If not supported: “Our register doesn’t display the balance. You can check it using your usual balance method.”
Avoid guessing. A cashier should never estimate or assume a balance based on prior receipts or partial approvals.
POS and terminal setups: standalone vs integrated, and how the flow differs
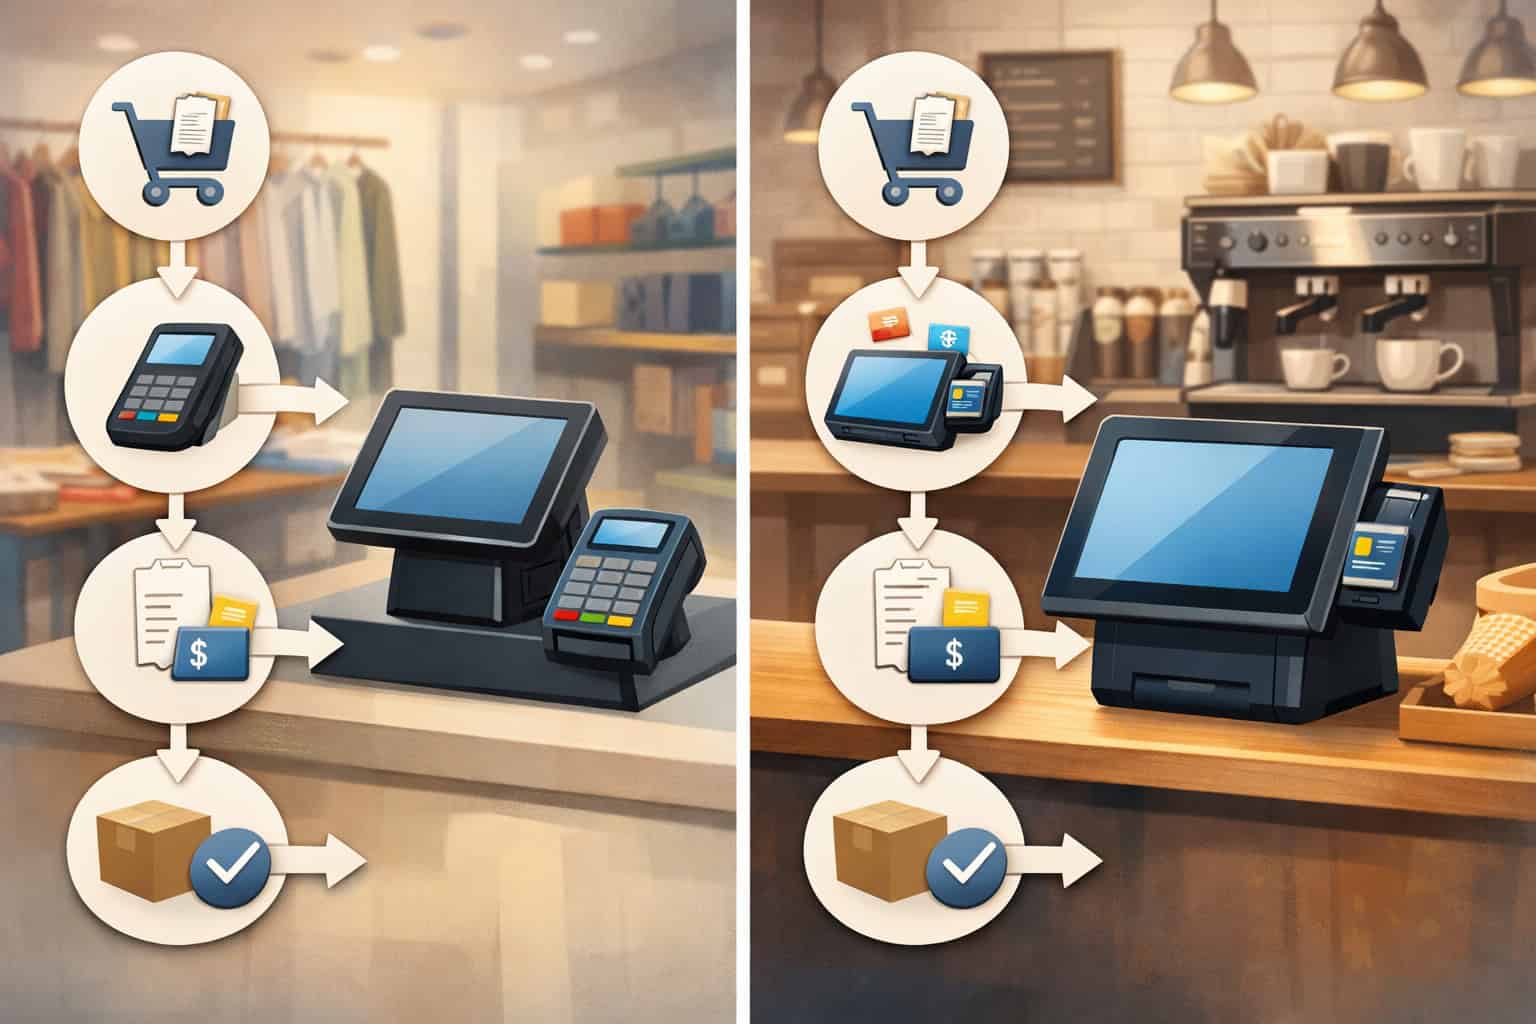
Your EBT checkout process will feel different depending on whether you use a standalone terminal or an integrated POS. Both can work well, but each changes cashier steps, troubleshooting, and the risk of mismatched totals.
A stand-alone EBT terminal means the terminal operates more independently. The cashier may need to enter the eligible amount into the terminal manually, or the terminal may receive less detail from the POS. This setup can be simpler to deploy but can increase cashier error risk if manual entry is involved.
Integrated POS means the POS and terminal communicate directly. Eligible totals are passed automatically, and the terminal returns authorization results back into the POS. This is typically faster at the lane and reduces manual entry mistakes.
Operational differences that matter:
- Standalone tends to require more cashier training and verification of amounts.
- Integrated tends to offer smoother split tender handling and better transaction logs.
- Standalone may produce separate receipts more often, which requires good receipt handling practices.
- Integrated systems often rely heavily on correct inventory flags and tender mapping; misconfiguration will show up quickly.
Inventory setup essentials: PLUs, tax flags, and product categorization
If you want accurate EBT totals, invest in clean inventory. Every training program fails if the item file is sloppy.
Your POS needs a reliable way to identify eligibility. This often includes:
- PLU/inventory flags indicating eligible status for relevant items.
- Department/category mapping that aligns with your POS’s EBT logic.
- Correct taxes setup: tax flags can influence eligibility separation depending on system rules.
- Clear handling for weighted items and produce PLUs.
Minimum inventory best practices:
- When adding new items, require a step for eligibility classification before the SKU goes live.
- For produce/PLUs, ensure the PLU list is standardized and mapped consistently.
- Audit the top-selling items monthly for eligibility accuracy.
- Use test baskets (mixed eligible/ineligible) after POS updates.
When eligibility is wrong, lane behavior becomes unpredictable:
- Eligible items ring as ineligible, creating customer frustration.
- Ineligible items mistakenly ring as eligible, creating compliance risk.
- Split tender amounts don’t match expectations, creating disputes.
Receipt requirements and transaction logs: set yourself up for dispute resolution
Receipts and logs are your front-line defense for customer disputes and audit readiness. Even if you never face an audit, you will face “I got charged twice” or “This didn’t pay for what I expected.”
Make sure your operation has:
- Clear receipt formats for split tender transactions.
- Ability to locate transactions by date/time, lane, cashier, and reference number.
- A process for storing or retrieving transaction logs for a reasonable period as defined by your store policy.
- A standardized way to document voids, refunds, and reversals.
At the lane, cashiers should be trained to:
- Always offer the receipt.
- Keep EBT and non-EBT receipts together if separate.
- Escalate disputes rather than “trying things” on the terminal.
Managers should be able to:
- Pull the transaction by reference number.
- Confirm whether a reversal occurred.
- Determine whether a duplicate authorization was settled or voided.
Common problems and how to fix them (lane-first troubleshooting)
EBT issues feel stressful because they happen in front of customers. The goal is not perfection; it’s a confident, consistent response.
Train your team to troubleshoot in layers:
- Confirm what the POS shows (eligible/ineligible totals, tender applied).
- Confirm what the terminal shows (approved/declined/partial).
- Confirm what the receipt shows (final amounts and references).
- Decide: proceed, adjust the basket, or escalate to the manager.
Below are the most common breakdowns and how to fix them without chaos.
Declines, wrong totals, and ineligible items accidentally included
Declines can happen for many reasons: incorrect tender sequence, insufficient balance, a misclassified item, or a network issue. Wrong totals usually trace back to inventory setup, discount application order, or cashier selecting the wrong tender.
When a transaction declines:
- Ask the customer if they want to try again (one retry is reasonable if the message is unclear).
- Confirm the POS is running only the eligible portion on EBT.
- If the system supports it, offer a balance inquiry per policy.
- If it still declines, proceed with another tender or allow the customer to remove items.
When totals look wrong:
- Check whether coupons/discounts were applied before tender.
- Look for an item that’s unexpectedly marked ineligible.
- Use item lookup to verify category/flag.
- If it’s a recurring issue, note the SKU for inventory review.
When an ineligible item was accidentally included:
- If the POS prevents it, it won’t authorize—treat it as a normal split tender issue.
- If the POS mistakenly allowed it due to misconfiguration, escalate immediately to management and correct the SKU mapping to prevent repeat.
What cashiers should say:
- “It looks like the register is only allowing EBT on the eligible items. We can finish the rest with another payment or remove items.”
Duplicate transactions and reversal issues: what to check first
Duplicate transactions are often misunderstandings, but they can also occur due to retries during connectivity issues or confusion after a partial approval.
First checks for managers/supervisors:
- Look up the transaction in the POS journal and confirm the tender count.
- Check the terminal reference numbers and timestamps.
- Identify whether the second transaction is an authorization-only event or a completed sale.
- Check for an automatic reversal message if the system supports it.
Lane guidance for cashiers:
- If the terminal appears stuck, don’t keep pressing buttons or retrying multiple times.
- Call a supervisor if the screen shows an unclear state.
- Avoid running a second transaction until you confirm the first one’s status.
Customer-friendly script:
- “I want to make sure we don’t run this twice. Let me get a supervisor to confirm what went through.”
Connectivity problems, downtime procedures, and network outages
Connectivity issues happen. Your job is to have an offline/downtime procedure that protects customers, keeps lanes moving, and maintains compliance. Some systems can’t process EBT offline at all. Others may support limited store-and-forward behavior, but you must follow your device and program rules.
A realistic downtime plan includes:
- A clear “EBT temporarily unavailable” message protocol.
- A supervisor decision tree: wait, move to another lane, or suspend the transaction.
- A method to document the outage window and affected lanes.
- A customer messaging script that is calm and factual.
Cashier steps during a network outage:
- Pause the EBT tender attempt if the terminal is not responding.
- Notify a supervisor immediately.
- Offer the customer options: wait briefly, use another tender, or suspend/cancel.
- If suspending is allowed, ensure basket integrity and receipt documentation so you can resume accurately.
Customer script:
- “Our payment network is currently having trouble processing EBT. We can try another lane, wait a moment, or you can use another payment method if you prefer.”
Receipt confusion and customer disputes: how to handle without escalating emotions
Receipt disputes often come from split tender confusion: two payments, two totals, or a partial approval. The best response is calm, factual, and anchored in the printed record.
Cashier approach:
- Listen and acknowledge: “I can see why that’s confusing.”
- Point to the receipt lines showing EBT amount and other tender.
- If the customer believes something is wrong, call a supervisor rather than debating.
Supervisor approach:
- Pull the transaction record using the receipt reference.
- Confirm whether the transaction settled, was voided, or reversed.
- Explain the outcome in plain language.
- If a correction is needed, follow the store’s returns/refunds policy.
Avoid these mistakes:
- Don’t promise immediate fixes without checking logs.
- Don’t accuse the customer of misunderstanding.
- Don’t re-run payments to “test” unless you’re doing a formal balance inquiry per policy.
Settlement and deposits: what operators should know (without overcomplicating it)

Store owners and managers should understand the basic lifecycle after the lane approves a transaction. While cashiers don’t need settlement details, supervisors do—especially when reconciling deposits, investigating disputes, or reviewing end-of-day reports.
At a high level:
- The terminal approves the transaction at checkout.
- The POS records the tender and prints receipts.
- Transactions are included in end-of-day or batch reporting.
- Settlement occurs through your processing flow and funds move according to your setup.
Operationally, this matters because:
- A transaction can be authorized but later reversed or not fully captured if something failed mid-flow.
- Deposits and reports must match tender totals, especially for split tender scenarios.
- Dispute resolution often depends on having clear authorization references and timestamps.
Manager best practices:
- Reconcile tenders daily: EBT tenders vs POS totals.
- Investigate discrepancies using transaction logs and terminal reports.
- Maintain documentation for outages, reversals, and manual interventions.
- Ensure staff understand that “approval” and “deposit timing” are related but not always identical.
Compliance and audit readiness: practical habits that reduce risk
Compliance doesn’t have to feel scary. It’s mostly about consistency: accurate item setup, consistent tender handling, and good documentation. The biggest risks come from well-meaning shortcuts at the lane.
Common cashier mistakes that create compliance risk:
- Manually forcing eligibility through department keys.
- Ringing items under a different SKU to “make it work.”
- Performing returns/refunds without following policy.
- Skipping receipts or failing to provide them on request.
- Ignoring repeat item-mapping issues instead of escalating.
Store policy essentials:
- Clear returns policy for EBT purchases and split tender.
- Defined procedures for voids and refunds, including who can approve.
- Documented downtime procedure for network outages.
- Training scripts for eligibility questions and partial approvals.
Recordkeeping basics (general guidance):
- Keep transaction records accessible via POS journaling tools.
- Retain receipts or receipt images where your system supports it.
- Log outages and major incident windows.
- Use supervisor notes for unusual incidents (customer disputes, reversals).
Cashier training that actually sticks: scripts, role-plays, and signage
Cashier training fails when it’s too theoretical. It succeeds when it’s built around the exact moments that cause stress at the lane.
Train these moments explicitly:
- Mixed basket with eligible and ineligible items.
- Partial approval and split tender completion.
- The customer asks “Why isn’t this eligible?”
- Terminal freezes or the network seems down.
- Customer claims they were charged twice.
Use simple scripts to reduce improvisation:
- Mixed basket: “I’ll apply EBT to the eligible items first, then we’ll handle the rest.”
- Partial approval: “It approved this amount. The remaining balance is this amount.”
- Eligibility dispute: “The register is marking it as not eligible. A supervisor can help verify the item setup.”
Signage best practices:
- Place a small sign near the payment area: “EBT applies to eligible items only.”
- Place a sign near categories that commonly confuse shoppers: “Some items may not be eligible.”
- Keep wording neutral and operational.
Operational checklists you can implement today
Checklists don’t slow your team down—they prevent the slowdowns caused by errors. Use these to standardize the EBT checkout process and reduce reliance on “that one person who knows how it works.”
Each checklist below is designed for real lane conditions: short, actionable, and consistent with how EBT transactions work at checkout.
Cashier cheat sheet: what to do in 60 seconds
Use this cheat sheet to keep the EBT transaction process at checkout consistent and fast:
- Scan all items normally.
- Apply coupons/discounts before tender.
- Ask: “Paying with EBT today?”
- Select EBT tender.
- Confirm POS is applying EBT to eligible total.
- Prompt: “Please enter your PIN.”
- Read the result:
- Approved: continue.
- Partial approval: state approved amount and remaining balance.
- Declined: offer retry once or another tender.
- Complete split tender for remaining balance (ineligible items and/or uncovered eligible amount).
- Hand receipts together and summarize: “EBT paid for eligible items; the rest was paid separately.
Do / Don’t rules:
- Do keep PIN entry private.
- Do call a supervisor if the terminal state is unclear.
- Don’t re-run EBT multiple times quickly.
- Don’t force items into different departments to change eligibility.
Manager troubleshooting checklist: quick diagnosis and resolution
When a cashier calls for help, use this sequence:
- Identify the issue type:
- Decline
- Partial approval confusion
- Wrong eligibility totals
- Duplicate transaction concern
- Connectivity/outage
- Receipt dispute
- Check POS transaction status:
- Tender recorded?
- Sale completed?
- Void possible?
- Check terminal status:
- Approved amount?
- Reference number?
- Any reversal message?
- Decide the resolution path:
- Retry once (if safe)
- Complete split tender
- Suspend/cancel transaction
- Move to returns/refunds process
- Document key details:
- Time, lane, cashier
- Reference numbers
- Customer-facing outcome
Manager scripts:
- “Let’s confirm what was approved on the screen and receipt.”
- “We’ll avoid running it twice—thank you for waiting.”
POS configuration checklist for EBT accuracy
Use this checklist to keep eligibility separation reliable:
- EBT tender configured correctly in POS and terminal.
- Integrated communication tested (if integrated POS).
- Eligible/ineligible totals display enabled (if available).
- The product file includes a clear eligibility flag or category mapping.
- PLU/inventory flags standardized for produce and weighted items.
- Tax flags reviewed for categories that influence eligibility.
- Coupon/discount allocation tested with mixed baskets.
- Split tender workflow tested end-to-end (EBT + second tender).
- Receipt format includes:
- Approved amounts per tender
- Reference numbers
- Clear split tender display
- Transaction logs accessible by managers.
- Downtime messaging and procedures documented.
A 30-day training + optimization plan
A strong front-end doesn’t happen from a single training session. It happens from repetition, measurement, and small fixes. This plan builds competence fast without overwhelming your team.
Days 1–7: Standardize the lane flow and scripts
Week one is about consistency. Train everyone on the same EBT checkout process and the same words to use.
Actions:
- Teach the “two buckets” model: eligible vs ineligible.
- Practice the exact tender sequence: scan → discounts → EBT → split tender.
- Train scripts for eligibility questions and partial approvals.
- Place cheat sheets at lanes.
- Identify top 10 confusion items from staff feedback.
Measurements to track:
- Number of manager calls for EBT per day.
- Number of voids involving EBT.
- Common decline reasons.
Days 8–14: Fix inventory mapping issues and reduce repeat disputes
Week two is about removing the root causes of slow lanes.
Actions:
- Review top-selling SKUs for eligibility accuracy.
- Correct miscategorized items and PLU mappings.
- Test coupon-heavy baskets and mixed baskets.
- Add or improve signage near common confusion zones.
- Create a manager escalation rule: “If an item is questioned twice, log it.”
Measurements to track:
- Repeat items flagged as “ineligible unexpectedly.”
- Receipt disputes and their causes.
- Time spent per EBT manager intervention.
Days 15–30: Build confidence with role-plays and outage drills
Week three and four are where you build resilience under pressure.
Actions:
- Run weekly 10-minute role-plays at shift start:
- Partial approval
- Mixed basket split tender
- Receipt dispute
- Conduct a short downtime drill:
- What to do if the terminal freezes
- How to message customers
- When to suspend or move lanes
- Create a simple EBT incident log for managers.
Measurements to track:
- Reduction in “panic escalations” during busy hours.
- Faster resolution times for declines/disputes.
- Fewer voids and fewer incomplete transactions.
A 90-day operational improvement plan
Once the basics are solid, the next step is making EBT operations predictable, measurable, and scalable across staff turnover and system changes.
Days 31–60: Improve reporting, reconciliation, and dispute handling
Actions:
- Standardize daily reconciliation of EBT tender totals against POS reports.
- Ensure managers can pull receipts and transaction logs quickly.
- Implement a consistent process for duplicate charge investigations.
- Review returns policy for EBT and split tender and train supervisors on it.
Outcomes to aim for:
- Disputes resolved using logs and receipts, not guesswork.
- Fewer end-of-day tender mismatches.
- Clear ownership: cashiers execute, supervisors resolve, managers document.
Days 61–90: Strengthen compliance habits and reduce training dependence
Actions:
- Add a monthly inventory eligibility audit for top categories.
- Require eligibility and tax flag checks in new SKU creation workflow.
- Refresh cashier training with short quizzes or quick drills.
- Review signage effectiveness and update based on real questions.
- Conduct a quarterly test after any POS change to confirm EBT checkout process integrity.
Outcomes to aim for:
- Fewer recurring eligibility issues.
- Less reliance on “expert cashiers.”
- Cleaner documentation and consistent policies across shifts.
FAQ
Q1) What does “how EBT transactions work at checkout” mean in simple terms?
Answer: It means your POS identifies which items are eligible, runs an EBT authorization for that eligible amount using the customer’s PIN, and then uses split tender for any remaining ineligible or uncovered amount. The system separates totals so EBT applies only to eligible items.
Q2) Why did the EBT transaction decline even though the customer says they have funds?
Answer: Common reasons include a low available balance (leading to a partial approval or decline), the POS trying to run EBT against the wrong amount, or a connectivity issue. Start by confirming the POS is applying EBT only to eligible totals and reading the terminal message carefully.
Q3) What is a partial approval and how should a cashier handle it?
Answer: A partial approval means the system approved less than requested, usually due to insufficient balance. The cashier should say: “It approved this amount; your remaining balance is this amount,” then complete a split tender or allow the customer to remove items.
Q4) Can the cashier manually change an item to make it eligible?
Answer: In most operations, that’s a compliance risk and should not be done unless your policy explicitly allows it with controls. If an item seems incorrectly flagged, complete the transaction using split tender and have a manager log the SKU for inventory correction.
Q5) How should split tender be handled in the EBT checkout process?
Answer: Run EBT first for the eligible portion, confirm the approved amount, then take a second payment method for the remaining balance. If the customer wants to remove items, do it before completing the second tender when possible.
Q6) Why do some receipts show two payments or two receipts?
Answer: Because split tender transactions involve multiple tenders. Some systems print separate receipts for EBT and other payment types. Train staff to staple them together and explain: “EBT paid for eligible items; the rest was paid separately.”
Q7) Can customers check their EBT balance at the register?
Answer: Sometimes. It depends on whether your terminal supports balance inquiry and whether your store policy allows it. If supported, the customer typically must enter their PIN. If not, staff should avoid guessing and direct customers to their usual balance method.
Q8) What’s the difference between a void and a refund for EBT purchases?
Answer: A void cancels a transaction or tender before it completes fully in your system. A refund happens after the sale is completed. Refund handling can be more restricted and should follow your store’s returns policy and system workflow, especially for split tender.
Q9) What should we do during a network outage affecting EBT?
Answer: Follow your downtime procedure: pause retries, notify a supervisor, and offer options (wait, try another lane, use another tender, or suspend/cancel if allowed). Document the outage window for reconciliation and dispute resolution.
Q10) What causes “wrong eligible totals” at checkout?
Answer: Most often, it’s inventory setup: incorrect product categories, PLU mapping issues, or tax flags that influence eligibility separation. It can also be caused by discounts/coupons applied in the wrong sequence. Fix the SKU data and standardize the cashier routine.
Q11) How can managers reduce EBT lane errors quickly?
Answer: Use scripts and cheat sheets, enforce “EBT first,” run weekly role-plays, and fix recurring SKU mapping issues. Also ensure managers can pull transaction logs to resolve disputes confidently.
Q12) What’s the best way to train new cashiers on the EBT transaction process at checkout?
Answer: Train the core flow first (scan → discounts → EBT → split tender), then teach three key scenarios: partial approval, eligibility dispute, and terminal connectivity issue. Use role-plays and real receipts so they learn what the results look like.
Conclusion
When your team understands how EBT transactions work at checkout, you gain more than speed. You gain consistency. Cashiers stop improvising, managers stop firefighting the same issues, and customers experience a predictable, respectful checkout—especially when baskets are mixed or balances are low.
The best-performing stores treat EBT like a system: accurate inventory flags, a repeatable tender sequence, clear scripts, and strong documentation through receipts and transaction logs. Most problems become easy to fix when you stop guessing and start reading what the POS and terminal are actually telling you.